Taming redgum
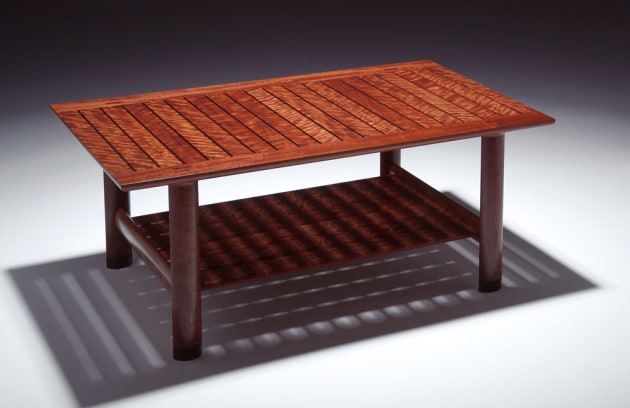
Above: Watershed coffee table, redgum with wenge detailing. Photo: Lisa Battaglene
Words: Evan Dunstone
Photos: Alex MacFarlane
River redgum (Eucalyptus camaldulensis) is a beautiful Australian native timber that has been sadly undervalued and misused in the past. Historically it was not considered a cabinetmaking timber. It is a relatively recent development that this striking and often highly figured timber has been used with understanding and sensitivity.
Drying
Redgum is a difficult timber to dry. Largely due to its density (about 900 kg/m3) it is very slow to air dry and quite different to most commercial species to kiln dry. It is only fairly recently (within the last 30 years) that drying techniques for redgum have been resolved and there are now several small redgum specialists who provide excellent dry stock.

Machining
Redgum is difficult to work with for many reasons. After a day machining redgum boards over your surface planner and through your thicknesser, both maker and machine will need maintenance. Surprisingly, while planer blades nick and tablesaw blades dull, bandsaw blades hold up remarkably well. I do a lot of re-sawing of redgum on my bandsaw, and the blades last at least as well as on most native hardwoods and longer than on some cabinet timbers. Try re-sawing a piece of Qld walnut on your bandsaw—you probably won’t complete the first cut before the wood is smoking and the blade dull.

Counter-intuitively, redgum loves high speed cutters such as the spindle moulder or even large router bits. The dense, interlocking grain gives a smooth clean cut with little burn and minimal tear-out (assuming your feed rates are reasonable and the cutters are sharp). A board that suffers dreadful tear-out on the surface planer will perversely come out clean as a whistle from the moulder. Using the moulder with redgum you can generally get away with a climbing cut (against the grain) on curved work that would otherwise end in disaster with a species such as blackwood. While I am not advocating poor technique, redgum gives you more options when it comes to shaping than most timbers.
Using hand tools

Redgum is not a timber that likes slicing hand tools such as a plane or spokeshave. Even the very finest craftspeople with the best tuned hand tools will be frustrated by this cantankerous timber. A well-tuned card scraper works well, as does a scraper plane, but you need a high angle plane with a narrow mouth to take an adequate cut. The HNT Gordon range of planes are designed with this sort of work in mind, but you will spend a lot of time sharpening.

Redgum works best when abraded rather than cut; reach for your rasp, file, angle grinder and sandpaper before you reach for your spokeshave and block plane. Australian makers persist with the northern hemisphere attitude that edge tools are sacred and abrasives are instruments of the devil. If James Krenov had been an Australian cabinetmaker I’m sure he would have extolled the virtues of quality rasps and the subtleties of different abrasive papers, as these techniques give you the engagement with the material (when working redgum) that he extols. I’ve never understood why hand planing is considered romantic and hand sanding is considered a chore; surely it’s the result that is important? Redgum is one of the easiest and most rewarding timbers to sand and it takes a finish second to none.

Dealing with the faults
Redgum is rightly famous (or infamous) for its myriad of gum veins, knot holes, borer holes and splits. Redgum trees do it tough and everything, including humans, has had a go at them. Over the years I have found three bullets embedded in redgum boards, so always check each board carefully with a wire brush before passing it over a planer.

How to fill the various voids in redgum is an article in itself, so I will mention the common techniques but focus on the ones I use. The simplest method is to use an off-the-shelf water based putty. Most makers will choose the can marked ‘jarrah’ as the closest match, but as most holes in redgum are ringed by a black stain—either from the tannins in the surrounding timber oxidising after the passage of a borer or because the hole is the rim of a gum pocket—this is not a very successful approach.
Another technique is to use a shellac-based filler, such as a coloured shellac stick or a workshop made shellac paste that you then colour with a compatible dye. Remember that a shellac paste or slurry is much thicker and therefore slower to dry than shellac used as a finish. Shellac cures when the alcohol evaporates, so if you are using this method in winter you may have to wait overnight before adding more or working it.
Epoxy fillers
Liquid epoxy resin such as the West system is an excellent filler when used with coloured dyes (when in doubt, use black). Designed for the rigors of the boat building industry, it expands and contracts with the natural movement of the timber and sands well. Liquid epoxy resin is runny so you must seal underneath the piece to be filled with packing tape (masking tape sticks to the epoxy) to stop the leakage. Packing tape does not stick well to dusty surfaces so wipe the timber with a meths soaked rag first. If you are trying to repair many voids and problems, you can pour the epoxy on to the timber surface and work it in with a squeegee. You will be amazed at how much epoxy a redgum board can absorb, and you will probably need two or three applications to fill everything. Remember that epoxy cures with a chemical reaction that is heat producing; the more you mix at a time, the hotter it will get and the faster it will set. Summer heat will spur along the reaction and you can soon find yourself with a very hot pot of glue that is setting before you can pour it.
You will find it a challenge to get the colour of subsequent batches of epoxy exactly the same as the first, so you run the risk of colour variations in your patches. You will also find that trapped air prevents the epoxy from flowing down the small pinholes. Air bubbles trapped in the epoxy in the larger voids can be unsightly. Paste epoxy, such as Techniglue, doesn’t flow like a resin and can be used as putty. For a fast patch you can use five-minute epoxy but it never seems to set as hard as the slow set.
All the epoxies will infiltrate the surrounding grain of a patch and cause a stain. This means that you must sand the piece down to expose fresh wood around the patch. Often what looks to be a successful patch reveals a hidden air bubble after sanding.
Superglue fillers
My favorite way of dealing with redgum is to use a superglue (cyanoacrylate) and a selection of coloured dust, plugs and patches. Loctite 401 straight out of the fridge is the best cyanoacrylate I’ve come across for this job (wear goggles and don’t glue your fingers together!). For pinholes, I use sharpened slivers of redgum about the size and shape of a matchstick. Put a dab of superglue in the hole, tap the plug in and saw it off flush. The patch, after sanding, looks very natural as the endgrain looks like the ‘backfill’ left by a borer.

For the larger borers that leave their own backfill, half the work is done for you. Simply stabilise the existing backfill with a few drops of superglue, then add some redgum dust and fill in the hole completely. For a large hole, such as a knot, I’ll make a patch using an offcut from the timber I’m working with. It is not often that I will try to make a perfect patch in redgum (that is, an invisible one) because of the dark edging already mentioned. Instead, I’ll deliberately leave an edge of variable width abound the patch and use a coloured paste epoxy to set it. This technique allows me to ‘repair as I go’ and if I am careful, I get very little staining around the repair. Whatever your patching technique, you’ll be
doing a bit of it if you are working redgum.

Veneer
One of the many reasons redgum has not found much favour with industry is that it veneers very poorly. A veneer log is selected for its uniformity, good colour, figure and lack of faults. As this goes against the very nature of the timber, such redgum logs are rare indeed. A veneer log is steamed to make it pliable and then sliced with a blade into 0.6mm sheets. The short interlocking grain of redgum resists this process and even the very best veneer is crumbly and full of fine cracks. The best way to veneer redgum is to re-saw it on a bandsaw and then put the sheets through a wide belt sander. We do this in my workshop quite a bit and it works a treat, but it is time consuming and you need the right equipment.
Joinery and glues
As redgum cuts so crisply with mortising bits it is possible to make extremely accurate joinery. However, although the wood is very dense and heavy it is not particularly strong for joinery. A tenon made from its short wavy grain can be surprisingly brittle resulting in unexpected failures. When using redgum for chairs, I always use double mortises with floating tenons that reinforce the figured timber. For the tenons I use straight grain stock for strength.
Redgum responds well to all the normal woodworking glues (PVA, polyurethane, epoxy, urea formaldehyde) with no particular adhesion problems. Preparation of the gluing surface requires more care than most timbers because of the danger of tearout. When edge jointing boards for glue up, care must be taken to get the feed rate and weight of cut correct to minimise tearout as glue lines with breakout along them are unsightly. I normally use a cross linking PVA or a polyurethane to edge glue redgum (say for a table top). I don’t use epoxy due to the cost, mess and the resultant dark streaky glue lines.
Finishing
Redgum is so hard and dense that it takes a superb polish. An oil finish is excellent, as the oil emphasises the reds and yellows and gives the work visual depth. A shellac finish is okay, but I would recommend a light coat of oil first to increase the depth of colour.
I do not recommend a two-pack finish or a nitrocellulose lacquer for redgum. Apart from the lacquer killing the richness of the colour, redgum is a volatile timber that moves a lot (8% tangential movement compared with blackwood at 4% tangential), and the hard finishes can’t seem to handle the movement over time. I’m sure we have all seen the unsightly white line of the sterites in a lacquer finish that has cracked when the wood has moved—lacquers don’t eliminate wood movement.
Redgum is one of my favourite timbers and I love using it. My only regret is that I don’t get to use it more often. Be prepared to do a lot of sanding, filling and sharpening and enjoy your next redgum project.
Evan Dunstone @dunstone_design designs and makes furniture in Queanbeyan, NSW. He leads a small team of makers at Dunstone Design and offers specialised masterclass training at certain times of the year. Learn more at https://www.dunstonedesign.com.au/