


Words and photos by Terry O’Loughlin
There are times when pre-veneered board is not available in the species or thicknesses you require and farming out the job to a specialist will add too much cost to the project. Before I learned how to hand lay veneer, the prospect appeared daunting. However, with the technique described here, you will be able to tackle small jobs right up to table tops, but bear in mind my comments about clamps…
Purchasing veneers
Knowing the sizes you will need, you can order your veneer. Remember that you will need to veneer both sides to avoid the substrate bowing. If the species of choice is a costly one, and only one side will be seen, you can use a cheaper species for the rear. A pack of veneer normally comes in consecutive sheets or leaves, and it is important to keep them in this order.
Layout
This is where the consecutive leaves come in. Turn over the first leaf and butt it against the second and you will note that one is the mirror image of the other. This is called book matching and this and other grain arrangements are the key to an attractive appearance of the final product, particularly when the timber has an obvious figure.
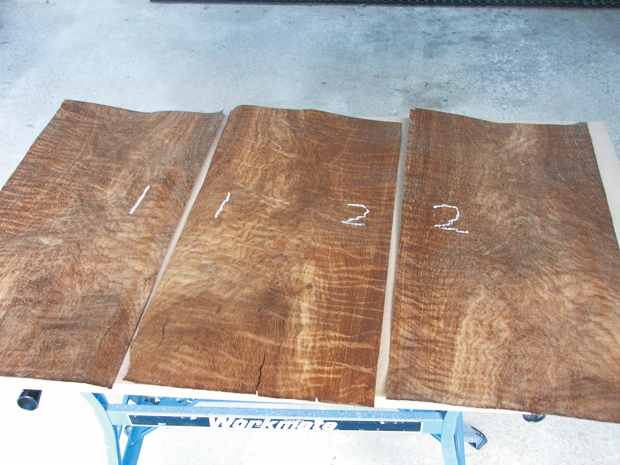
Depending on the width or height of the panel to be covered, you may need to join two or more leaves together to complete the job. Lay out the veneer leaves, checking both sides to determine which you wish to use as the outer surface. Then mark the leaves on what will be the underside to ensure that you maintain the correct joins (photo 1). I have used chalk so that it shows up in the photo, but pencil is less untidy.
Shooting the edges
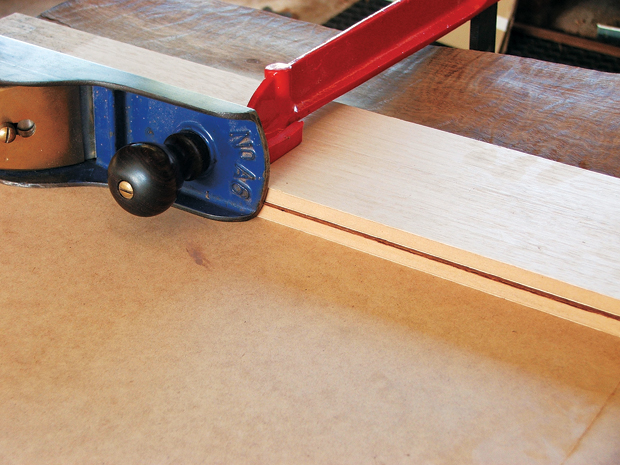
The next step is to shoot the edges to ensure they are straight and can be joined without any gaps. Veneers may have straight edges when they are cut, but by the time you come to use them they may have moved or been damaged and usually require trimming. Clamp the first two leaves with the edges to be joined between two straight boards, so that they protrude only enough to straighten the edges. This should be no more than 2–3mm. With a sharp and finely set plane on its side, plane them straight (photo 2). Line up the next join and joint it in the same way, and so on until enough leaves have been jointed to cover the panel to be veneered.
Taping
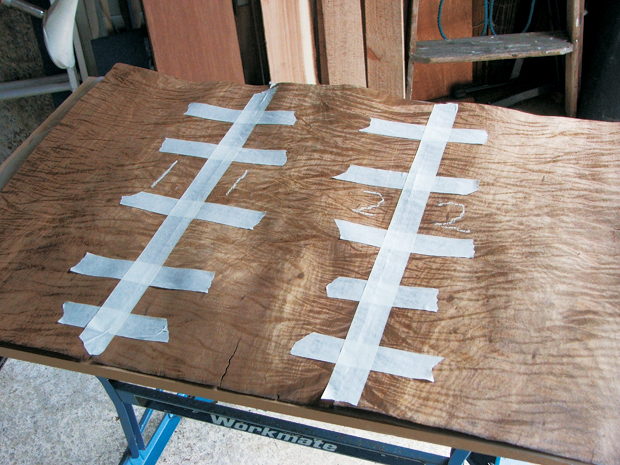
Beginning on the underside, take some masking tape and stick strips at right angles across the joins. Masking tape has a small amount of stretch. Use this to help pull the edges together. Then run a length of the tape along the join to further hold it in place (photo 3). You will note that the veneer is buckled. The more figure in the timber, the more it is likely to be buckled. In severe cases, it may be necessary to gently press the leaves between two sheets of damp blotting paper so they can subsequently be glued down without splitting. The reward for the extra work is a potentially more interesting final appearance.
Now carefully turn the joined pieces over. This is the surface which will be on the outside. Taking veneering tape, run a length along the joins (photo 4). Veneering tape is a thin gummed paper tape and is available from veneer suppliers. It only needs to be moistened with a damp cloth to stick it down. When this has dried, turn the assembly over and carefully remove the masking tape. It is safer to pull it away at right angles to avoid stress on the join and the veneering tape below.

Substrate
Particleboard, MDF or plywood are all suitable boards for laying veneer on. It’s best to trim this to size at this point. I used 9mm plywood in the example shown. Roughing up the board surface (esepecially if using MDF ) with a toothing plane or coarse abrasive sheet will help the glue to stick. Dust it down carefully before applying the glue and if necessary wipe with a tack cloth.
Gluing and pressing
If you don’t have access to a veneer press, there is a way to manage without. You will require two pieces of reasonably thick manufactured board (I used 16mm MDF here) at least as large as the job, but not much bigger, a sheet of plastic the same size (so that the glue will not stick to the lower board) and lots of clamps. There is a saying among furniture makers and other woodworkers that you can never have too many clamps. This is a good example of why.
You may wish to begin with the side which will not show in the finished project. Place one of the two boards on your bench and spread the plastic sheet over it. Place the first veneer face down on the plastic. Now spread adhesive on one side of the substrate or panel. I use cross-linked PVA, but I have seen others using polyurethane. Polyurethane glue sets in the presence of moisture, so it will assist the bond if you first lightly spray the veneer surface with water.
Either will do the job, but I find polyurethane messy and dislike having to wear gloves to avoid getting any on my fingers. PVA washes off with water; polyurethane takes days to scrub off, and almost never comes off clothes.
Place the glued substrate on the veneer and the second board onto the substrate. Then apply clamps in a systematic way until pressure is evenly distributed over the work (photo 5). Take note of the long reach F-clamps: they ensure that pressure is applied to the middle of the panel being veneered. If you are unable to source such clamps, cauls can be used. These are pieces of timber sawn or planed to a slight camber and clamped from the edges across the work to give you pressure across the work.

When the glue has set, remove the clamps and take out the panel. Now with a Stanley or snap-off knife and with the veneered surface down, carefully trim the excess veneer around the edges, taking care to cut inwards from the corners when working across the grain. This will avoid the danger of the veneer splitting out. It is not necessary to cut through the veneer in one pass of the knife. Several light cuts will make the process easier to control. Photo 6 shows the trimmed panel. Now take the second veneer face down
on the plastic and repeat the process.

Cleaning up and finishing
Moisten the veneer tape with a wet brush or cloth and when it begins to become translucent it can be peeled and scraped off. Then wipe off any remaining gum. Scrape and sand till smooth but bear in mind the thinness of the veneer if you are considering using a mechanical sander; it is easy to go through to the substrate.
At this stage the panel is ready to be polished. The photo below shows the panel after an oil finish was applied.
The principles of hand laying are straightforward but open up a range of possibilities for woodworkers.
