From Tree to Table
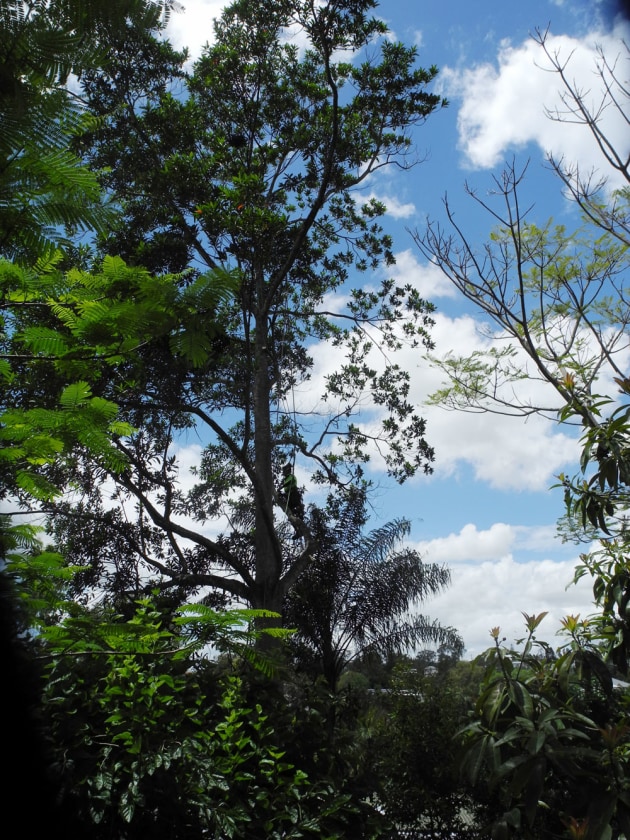
Above: A native quandong tree and the finished table made from it is shown some 18 months after the tree was felled.
Words and photos: Dante Stivanello
There is a romance associated with the idea of using a tree growing in your own backyard for furniture. Perhaps the tree is old and at risk of falling, or in the way of a renovation or extension. Whatever the circumstances, it can be very rewarding to use timber that would otherwise be chipped into tiny pieces and lost forever.
In early 2018 I was contacted by a client who wanted me to build a dining table using slabs milled by an arborist from a quandong tree that had grown in their backyard. After inspecting the timber, providing a quote and detailing the process involved, the client and I agreed to the commission.
Fast forward to late December 2018 and I had completed the dining table and delivered it to its new home. The clients were thrilled with the outcome and proud to have their new dining table made from a tree grown in own backyard. This was a very rewarding experience for me and a true tree to table project.
However there is more involved than first apparent and important steps need to be taken to ensure a successful outcome. The following information is for anyone considering using their own tree to make furniture.
Tree suitability
Australia has an incredibly diverse range of native and introduced species, however not all are suitable for furniture. If unknown, a qualified arborist will determine the species of the selected tree and from there you can ascertain its suitability1.
The overall health and condition of the tree will also bear on the quality of the timber. If the tree is heavily decayed and damaged by termites or borers it will most likely produce little usable timber, if any.
The tree will need to be of reasonable age and size. Generally a 400mm diameter is required to produce usable boards of heartwood. Tree shape is also important and straighter trunks will naturally yield more suitable boards.
Sawing and storage
A qualified arborist will fell the tree correctly and safely, and may then use a portable sawmill to cut the trunk into slabs. This is when you can get your first glimpse of the colour and quality of the wood inside.
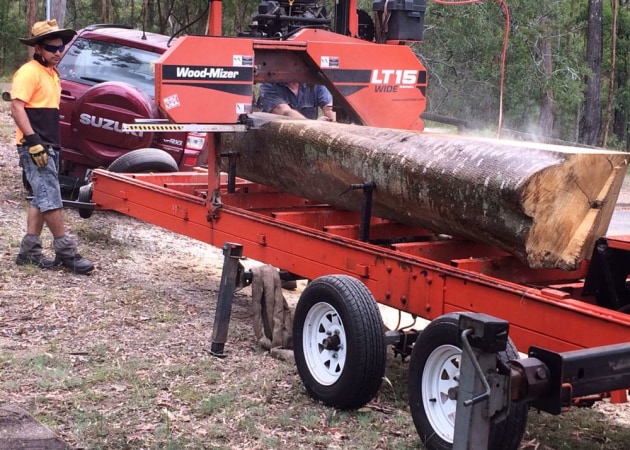
Above: The quandong tree is sawn on the Wood Mizer portable mill. Let your sawmiller know in advance the use you have in mind for the sawn timber.
Slabs should be a minimum of 50mm thick. As the wood dries it will lose a considerable volume of water and shrink in thickness. Thicker slabs will also better withstand the internal stresses that can cause warping, twisting and cracking.
Prior to stacking it is very important to seal the ends of each slab. This is best done the same day the tree has been milled as the slabs will start shedding moisture almost immediately through the exposed endgrain. If the ends aren’t sealed rapid moisture loss can cause splits and warping. You can buy proprietary waxed based end sealers or alternatively apply several coats of a latex paint.
Air drying
Stack the slabs on a hard flat surface around 400mm off the ground. Use stable supports that are not more than 600mm apart. For airflow the slabs also needed to be stickered – 20 x 20mm garden stakes cut to support the full width work well – space them around 400mm apart. The stickers should be the same thickness as this helps to keep the slabs flat and reduce any warping.
Strapping the pack tight after stacking will help to prevent warping, cupping and twisting as the timber dries. Ratchet straps are ideal for this and best placed 500mm to 750mm apart, making sure there is a strap close to each end. Edge protectors will help prevent the straps from digging into the slabs.

Once sawn, slabs need to be stickered in stacks. The ‘pack’ was then strapped and covered before being air and then kiln dried.
Covering the stack will protect it from the weather. A sound structure can be made using roofing iron and timber (or marine ply and timber) ensuring it is stable and weighted down to prevent blowing away. Leave a space between the top slab and the roof for airflow. Monitor the stack on a monthly basis to make sure there are no leaks and also to retighten the straps as the timber shrinks.
The recommended moisture content for furniture grade hardwoods is between 8 and 13%2. Timber for use in furniture needs to be dried to ensure its structural integrity and greatly reduce wood movement. Dry timber will glue and join effectively, and take a finish without reaction.
As a guide, a 25mm thickness of timber can take up to 12 months to dry. One important point to remember is that
air drying will only reduce the moisture content (MC) of the slabs to the surrounding temperature and relative humidity (this is called the equilibrium moisture content or EMC). In humid and warmer areas such as Queensland, kiln drying will be required.
Kiln drying
Once your slabs have reached around 25% MC they can go in a solar kiln to finish the drying process. Commercial kilns will charge a cubic metre rate to dry your timber. I have used LDS Silviculture in Federal, NSW a company which owns and operates solar kilns for this purpose.
A kiln will ensure uniform drying in much less time than by air drying alone. For example, if your pack of slabs takes four months to reach 25% MC it may take up to a further 12 months to reach 13% – or not, if you happen to live in a humid climate. However placed in a solar kiln, the pack may only take another four to six weeks to reach that moisture content.

After air drying the quandong slabs were finished off in a solar kiln.
The reason it is best to air dry the timber first is that if you place the timber wet into the kiln it will cause large stresses to the timber by drying too quickly, this can result in the timber being unusable. Lowering the initial moisture level slowly by air drying
to at least 25% will ensure that the remaining drying in the kiln will be done with minimal stress to the timber.
Once the timber has reached its optimum moisture content of between 8% and 13% the timber is ready for collection. The pack should be stored internally in a dry, well ventilated area, stacked as previously discussed awaiting use.

The finished quandong table shown in the client’s home.
This is a lot to consider when thinking about using a tree from your yard for furniture. It is not a quick process and requires attention to detail. However with time and care the steps and processes mentioned can make use of a valuable resource and help
provide a quality material for your furniture making.
1. Some references for wood identification include: Keith R Bootle, Wood in Australia, Types, Properties and Uses, 2nd Ed 2010, McGraw-Hill Education, Morris Lake, Australian Rainforest Woods, 2015, CSIRO Publishing, Morris Lake, Australian Forest Woods, 2019, CSIRO Publishing. See also Euclid http://keyserver.lucidcentral. org:8080/euclid/keys.jsp
2. See Australian Standard 2796-1999: Timber – Hardwood - Sawn and milled products.
Portable sawmill suppliers:
Premier Timber Milling (Wood Mizer): https://www.woodmizer.com.au/
Lucas Mill (Lucasmill): https://www.lucasmill.com/
Hardwood Mills (Norwood): http://www.hardwoodmills.com.au
Dante Stivanello is a builder, furniture designer and maker in Brisbane. Learn more at stivanellobespoke.com.au


