Words and photos by Ashley Allen
As a part-time, 36 year old mature age student studying for a Diploma of Furniture Design and Technology at RMIT TAFE in Melbourne, I was unsure whether I would fit in with the ‘immature age’ students, but the teachers have been extremely supportive and fantastically helpful. For one subject we were asked to design a storage unit. We had to do market research, create a design brief and generate a timeline. I decided upon a display cabinet, mainly because we needed one at home.
I wrote a brief for a simple, elegant, curvaceous (in contrast to the rectilinear boxes on the market) unit. The piece had to be stable (I have three inquisitive young children), partly dust-proof and suit a corner setting. I limited my budget for materials to $400. Of the many thumbnails I sketched, one appealed to me most for its simplicity and Art Deco streamline aesthetics. This art movement reflected the prosperity and optimism of the times, however I wanted to use ‘eco-friendlier’ materials whilst still channeling a little bit of Raymond Loewy’s streamlined repetition.
Curving the shelves
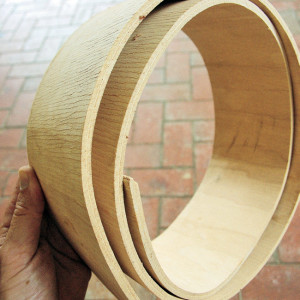
The devil in making this relatively simple construction was going to be creating consistent radius bends. After some failed steam-bending attempts, I visited Plyco in Fairfield and bought 6mm and 8mm flexiply, available in 1200 x 2400mm sheets. This interesting lightweight material was easily bent by hand to the 100mm radius I wanted. However, be warned, the wood fibre composition is of low density and the material can easily chip-out and dent.
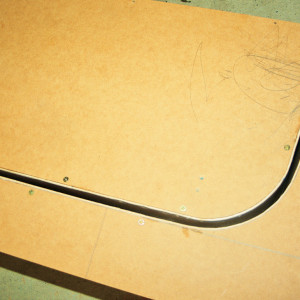
To make the curved shelf sections rigid, I planned to glue and clamp two layers of flexiply together. To create a repeatable curve, I made a jig from 16mm thick MDF. From two flexiply sheets, I cut eight 2400 x 300mm wide strips. I applied PVA glue liberally to two of these at a time, taping the ends of each loosely together.
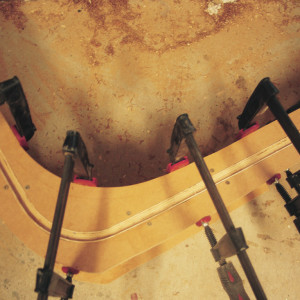
I then clamped the jig with the two strips located inside and let the glue set overnight.

The next day the clamps were removed and I was rapt with the result. The shelf was now rigid and the curved section strong and repeatable. This process was repeated for the three other shelves but at different locations along their length.

These were cut to length on a tablesaw and slots were then cut using a jigsaw.

The resulting sections were trimmed with a handplane and layed out before a dry assembly.

To allow the 6mm thick front door to be mounted flush with the front of the unit, 6mm was taken off the front of each shelf in the main section using a bandsaw.
Tiered base
I cut three ‘tiers’ of 32mm thick MDF—these were 332, 364 and 392mm wide x 1200mm long. The weight of these ensured stability. The front left corner of each board was ‘rounded’ on the bandsaw and sanded smooth.
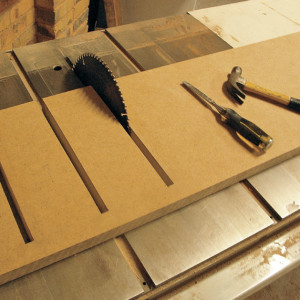
On the tablesaw, I cut 4 x 85° angled slots in the top tier to receive the bottom end of each shelf.
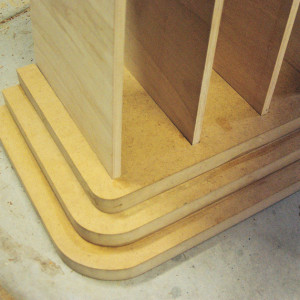
I tidied up the blind end of each slot with the bandsaw and chisel. After another dry fit the bottom base layers were then glued, clamped and screwed (from underneath) to the top tier. Shades of brown
I wanted to achieve a distinct progression in brown hues across the four shelves. From the bottom up I used first Wattyl walnut stain with some black ink, then walnut stain on its own, then Wattyl’s cedar stain. The top shelf was left unstained. I then applied Wattyl’s Two Coat Finish to gloss and seal the shelves. The base was sprayed with a grey primer and, after drying and sanding, sprayed again with three coats of gloss black enamel. The shelves and the base were next slotted together.
Backing support
To square up the unit a 2400 x 1200 x 3mm piece of backing ply was attached temporarily to the back of the unit. A cutting line was pencilled around the outside of the main section. The ply was cut, sanded, sealed and screwed to the back of the unit.
A support post for the corner of the cabinet was made from a 1636 x 50 x 19mm Tas oak. I cut three 12mm wide x 10mm deep slots at 400mm intervals to hold the shelf ends. Then I glued and clamped a round beading to its front face to conceal the slots. Finally I pre-drilled a hole in the base to allow the support post to be screwed into position from underneath.
Glass and hinges
Although the side glass panel of the cabinet was a simple rectangle for a glazier to cut, the front door was another matter. For irregular shapes glaziers tend to like being supplied with a 1:1 template so they can cut accurately. To make a template I clamped a 3mm thick 2400 x 1200mm MDF sheet to the front of the cabinet and scribed around the inside of the main section. The resulting glass door, with a 4mm hole for a handle, was cut accordingly.
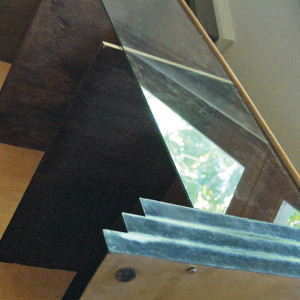
To install the fixed glass panel, the cabinet was turned on its side. The rectangle was slid into position, using the slot on the support post and a length of beading on the backing ply. The support post was then glued and clamped to the shelves and fixed to the base with a screw from below. The cabinet was carefully stood back upright.
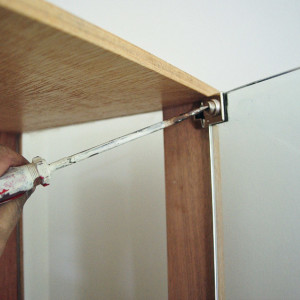
After a bit of searching, I purchased a set of glass door hinges online from Hafele (www.hafele.com.au). Although a bit plain and square, they could support, enclose and pivot the 6mm door from the side post without any extra holes having to be drilled in the toughened glass. The glass door was lifted into position and secured in place by tightening the rear grub screw.
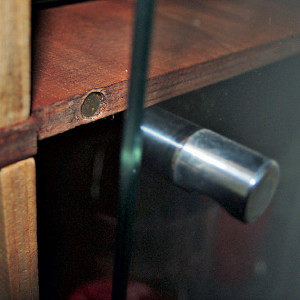
Finally a 10mm hole was drilled into the middle shelf to accommodate a rareearth magnet and a cylindrical handle attached to the door. I am very satisfied with the finished product. It met the design brief in all aspects. It is functional, visually appealing and I learned many things during its construction.
This story appeared in Australian Wood Review issue 71 (June, 2011). Ashley Allen lives in Melbourne and can be contacted via email at: ashley@abarrubber.com


