Photos and sketches by Robert McGregor
For some years I wanted to make a new front door, something that was different—unique even. I had seen work by Qld woodworkers Randy DeGraw and Roger Chadwick going back to the late 90s and was drawn to their work. I worked out more or less what I wanted and, to be sure, set about carving a one fifth scale version. When I was happy with my trial carving, I then worked out how to construct a door that could accommodate the relief carving.
The door structure
I made the new door 42mm thick to replace the existing one. I had to consider the location of the lock and hinges, and allow for the 50mm gap between it and the internal security door.
A traditonal frame and panel construction would allow the wood to expand across its width. The carved panel was divided with a vertical member (mullion), attached to the top and bottom rails. The panels are fixed to the mullion with biscuits 150mm apart, but float in a tongue and groove joint into the main frame. Six mortise and tenon joints hold the frame together.
Choosing the timber
I looked for wood that was available in reasonable widths, a pleasing colour, straight and stable, and reasonably easy to carve. My timber supplier had some slabs of New Guinea rosewood that were 300mm plus wide x 50mm thick. I cut one slab in half to get 150mm for the two stiles and top rail. Another piece provided the bottom rail at 175mm wide.
Preparing the timber
Machining timber of such size in a home workshop is quite a job. Fortunately I have a thicknesser but I still needed to first get a straight edge on the board. I used a 100 x 6mm aluminium straight edge with the router fitted with a 30mm straight cutter. I made one pass, then flipped the timber over and used a flush trimmer bit to follow the previously machined surface to complete the full 42mm width machining of the edge. The other edges could then be thicknessed to size.
Mortise and tenons
A mortising attachment for my pedestal drill made removing the waste fairly easy. Time spent setting up was worth the effort. A digital bevel box (accurate to 0.1 degree), made sure the face edge of the stile was at right angles to the drilling machine. The mortise drill is a half inch square and must be set exactly in the centre of the stile. The stile is moved along the width of the drill for the each cut. Once set up in the compound vice the cutting of the mortise is done very quickly.
I cut the tenon with the router straight bit, first one half then the other. A test joint with machined offcuts checked the fit before launching into the real thing.
Tongue and groove
The groove was cut into the frame with a 12mm straight router bit—accuracy is important as the 11mm tongue on the panel must be free to slide. When assembled the 2mm gap between the face of the panel and the frame becomes the expansion joint.
The tongue was cut into the panel edge with the router and a straight bit. When cutting the top and bottom tongues, allow for a 1mm gap between the end of the panel and the rail. Plane a small arris on the leading edge of the tongues. Cut the tongue on the ends of the panels before biscuit joining the panel to the mullion. Mark precisely the position of the biscuit slot so that when assembled the panel pieces are 1mm shorter each end than the mullion as described above.
Assembly
For assembly I used Selleys PVA+ exterior glue—do a dry fit first to check all is well. Unless you are feeling very confident I advise finding a second pair of hands for gluing and clamping. The joints will have a lot of glue in them that may start to go off before the pieces are clamped up fully.
Stage one is to glue and clamp the panel pieces to the mullion. A little paraffin wax along the edge of the tongue will assist with movement before the second stage of gluing and assembling the rails, followed by the stiles. Clamping only needs to be between the stiles at the rail. Clamping the mullion to the rails should not be necessary if the rail to stile joint is tight.
Designing the carving

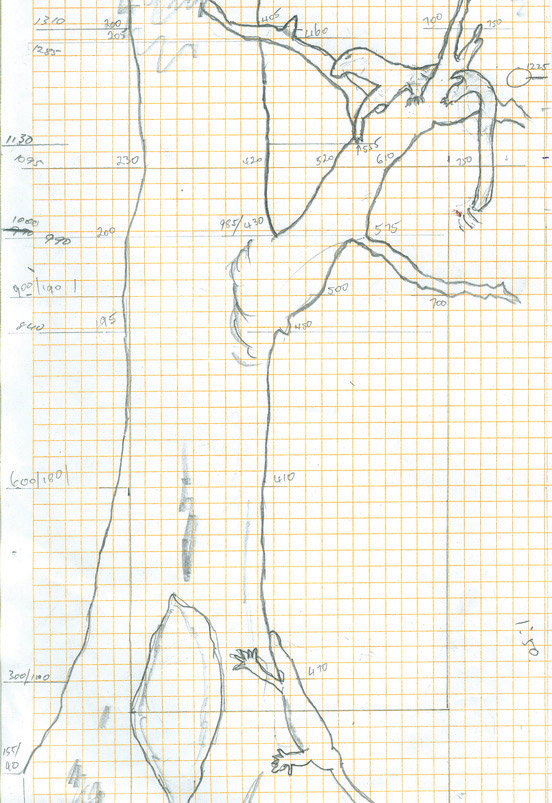
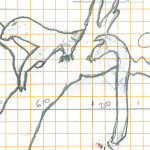
I started with a postcard of a tree I liked. By scanning and enlarging the image I got it to the fifth scale size. For the goanna I think I downloaded every picture available on the net, which got me close to the image I wanted. I then transferred the images to 5mm graph paper.


The design was then scaled up as co-ordinates on a graph which I then marked on to the actual door. I filled in the spaces in between freehand—just like a dot to dot! The goanna drawings were enlarged on the computer to the required size. The goanna tail handle was carved and fitted to protrude out from the face of the door.


The leaves were easy. I layed a spray of leaves over a sheet of paper, took a photo and then printed that out at full size. All I had to do then was to trace it onto the door. This also gave me a good quality picture to reference while carving.
Carving the design
The depth of the relief was a minimum of 10mm; the foreground (leaves) 4mm. In places, the carving is very close to the biscuit joints and grooves, which is why the door needed to be so thick.
Roughing out was done with a router around the outline (don’t try to remove too much at once), continuing with a 100mm angle grinder with a coarse sanding disc. Hand carving chisels were used to complete the fine work. The total time to carve and sand was seven days.
The weight of the door is approximately 44kg, so I ended up used six stainless steel, ball Hirline hinges to be sure of carrying the weight.


